
The Ultimate Guide to TikTok US Posting Schedule: Maximize Reach and Engagement
December 12, 2025TikTok Audience Insights Generator
December 13, 2025Table of Contents
- Unlocking the Power of TikTok Analytics: Why Data-Driven Scheduling Matters
- Getting Started: Navigating TikTok Analytics for US Creators
- Decoding Engagement Patterns: Identifying Your US Audience’s Peak Activity
- Building Your Data-Backed US TikTok Posting Schedule
- Advanced Tips: Maximizing Reach and Engagement with TikTok Scheduling Tools
- Frequently Asked Questions About TikTok Analytics and US Posting Schedules
- Conclusion: Take Control of Your TikTok Success with Analytics-Driven Scheduling
Unlocking the Power of TikTok Analytics: Why Data-Driven Scheduling Matters
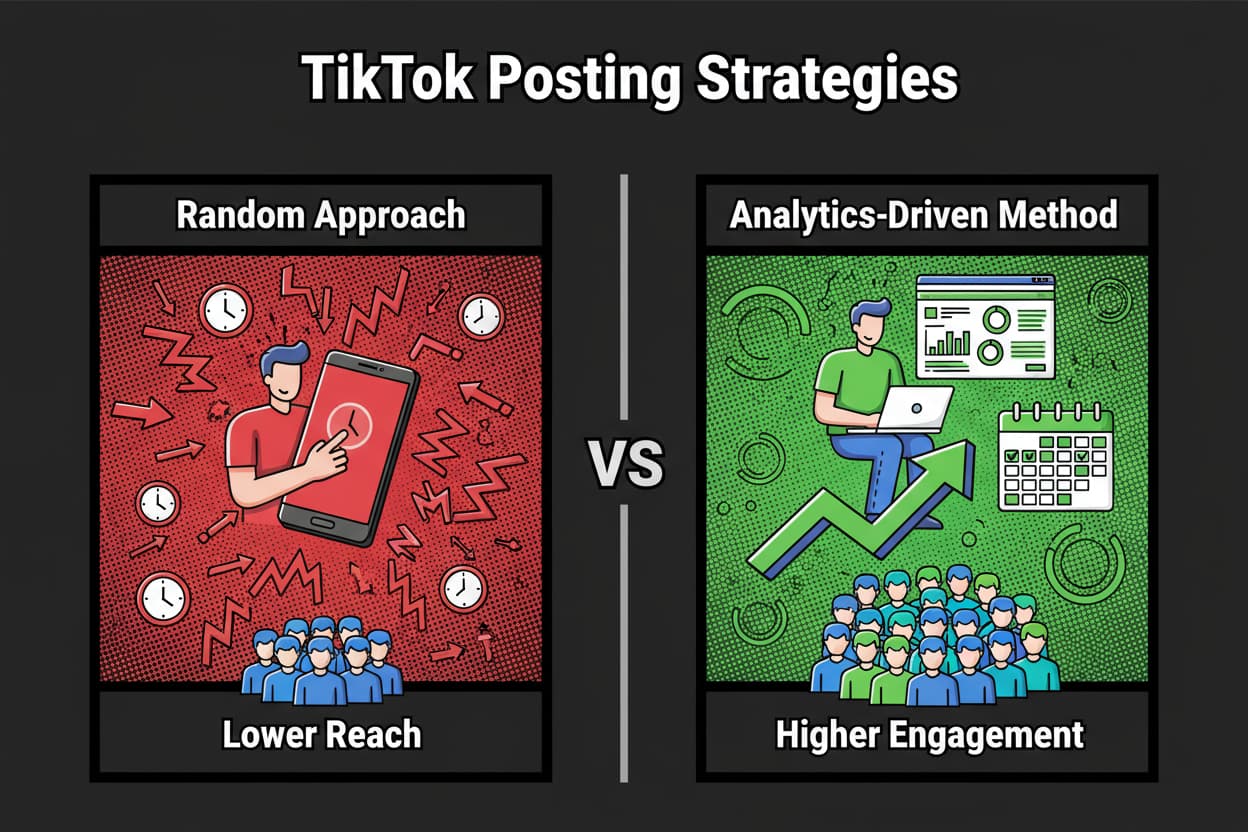
You post a great video at lunch and it flops. Then a throwaway clip at 9 PM takes off. Sound familiar? Random posting creates random results. Your content might be strong, but without a US-focused schedule built on tiktok analytics, you’re leaving reach on the table.
Here’s the problem: the US isn’t one time zone. Your audience might be heavy on ET and CT, with a meaningful chunk in PT. So if you post when half your US fans are offline, you kneecap early velocity. And early velocity matters for tiktok reach because it fuels the first wave of views, engagement, and watch time that tells the algorithm your video deserves wider distribution.
The solution is simple, but not easy. Use tiktok analytics to find when your US audience is most active, correlate those windows with your own performance by publish hour, then build a schedule that starts 30 to 60 minutes before your peaks. Do that, and you’ll stop guessing and start compounding.
A quick story to set the stage. A lifestyle creator we advised shifted from “whenever I’m free” posting to an analytics-backed cadence anchored in ET and CT peaks. Over four weeks, average 24-hour views rose by [VERIFY], and engagement per impression increased by [VERIFY]. Same content quality. Different timing. That’s the power of data-driven scheduling.
Why does timing swing results so much? Audience activity ebbs and flows hour by hour. Posting time alone can move reach by [VERIFY] on similar videos. If you post into a trough, you’re asking your content to swim upstream. If you post into a crest, you ride momentum.
Let’s talk business impact for brands and teams. When you align posts to US peak windows, three things improve: 1) your V24 baseline, 2) your engagement rate on impressions, and 3) your completion and watch time. That trio powers both top-of-funnel reach and mid-funnel actions like profile taps and follows. Over time, a stronger average makes outliers likelier.
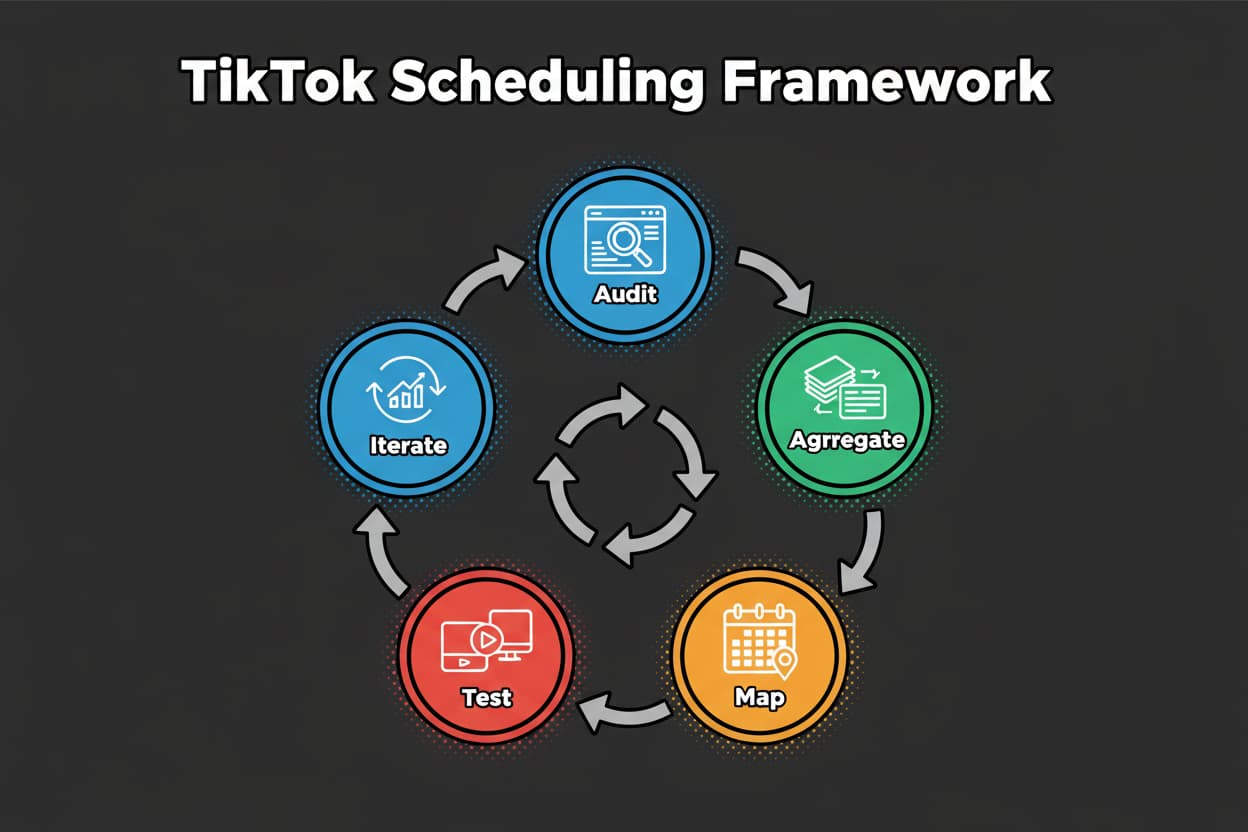
This guide walks you through a pragmatic five-step loop that turns analytics into a repeatable US schedule:
- Audit → Aggregate → Map → Test → Iterate.
You’ll see exactly where to find US audience insights, how to bucket performance by publish hour, and how to translate peaks into a weekly plan you can actually run. We’ll also cover edge cases like split audiences across regions, low data volume, and shifting time-zone distributions.
You’re about to turn guesswork into a repeatable system. Next, we’ll open the exact analytics panels you need and show you where US-specific insights live.
Getting Started: Navigating TikTok Analytics for US Creators
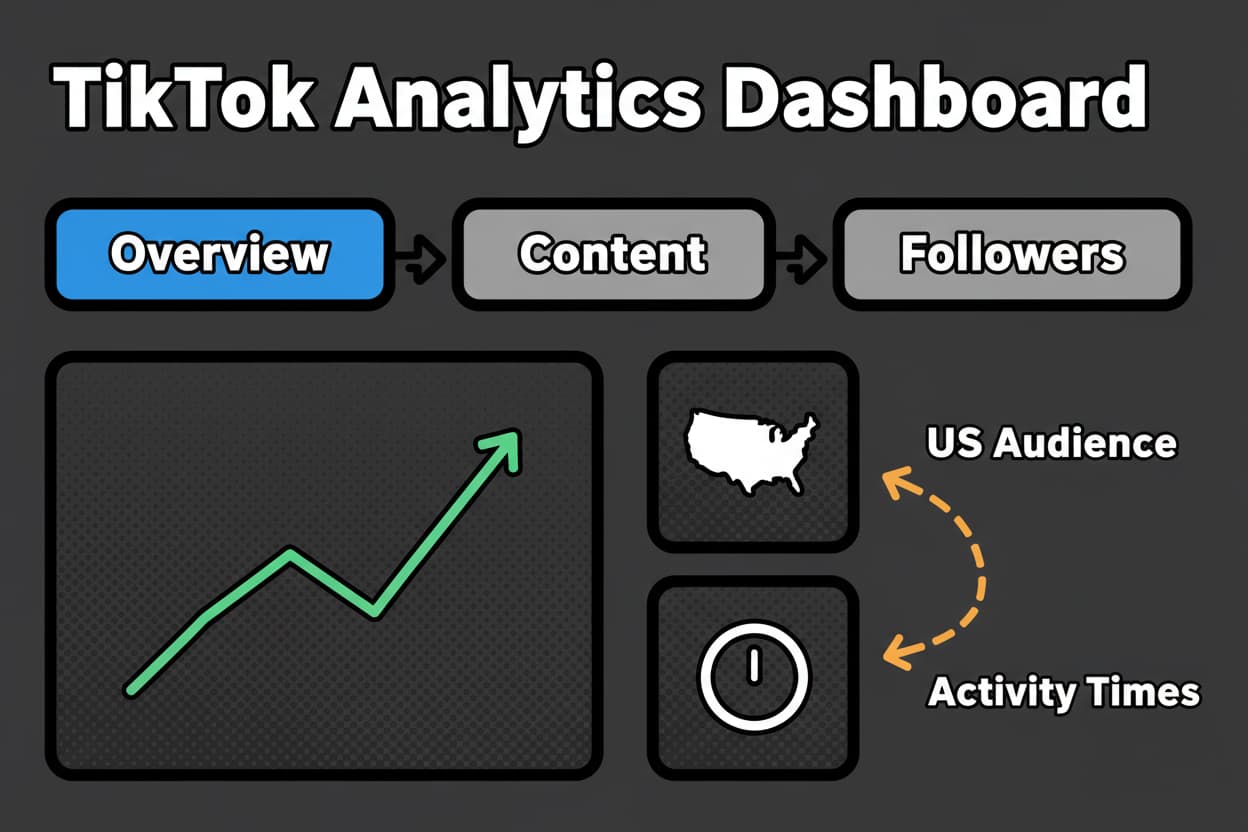
First, make sure you can access analytics. Creator and Business accounts have analytics via the TikTok app and on web. Inside analytics, you’ll find three core areas: Overview, Content, and Followers. These panels give you performance rollups, per-post metrics, and audience insights you’ll use to craft your TikTok US Posting Schedule [reference:3].
- In the app, go to your profile, open Settings and privacy, and tap Analytics if you’re on a Creator or Business account. On desktop, open your profile and select Analytics from the menu. You’ll see Overview, Content, and Followers as primary tabs [reference:3].
Here’s what matters for US scheduling:
Start in Followers. This is where you’ll confirm your audience location and see when they’re active. Look for Top Countries and Top Cities. If the United States leads by a healthy margin, plan with a US-first mindset. If the US share is borderline, note the other dominant region. We’ll cover split audiences later, but for now, you just need a read on where your viewers live [reference:3].
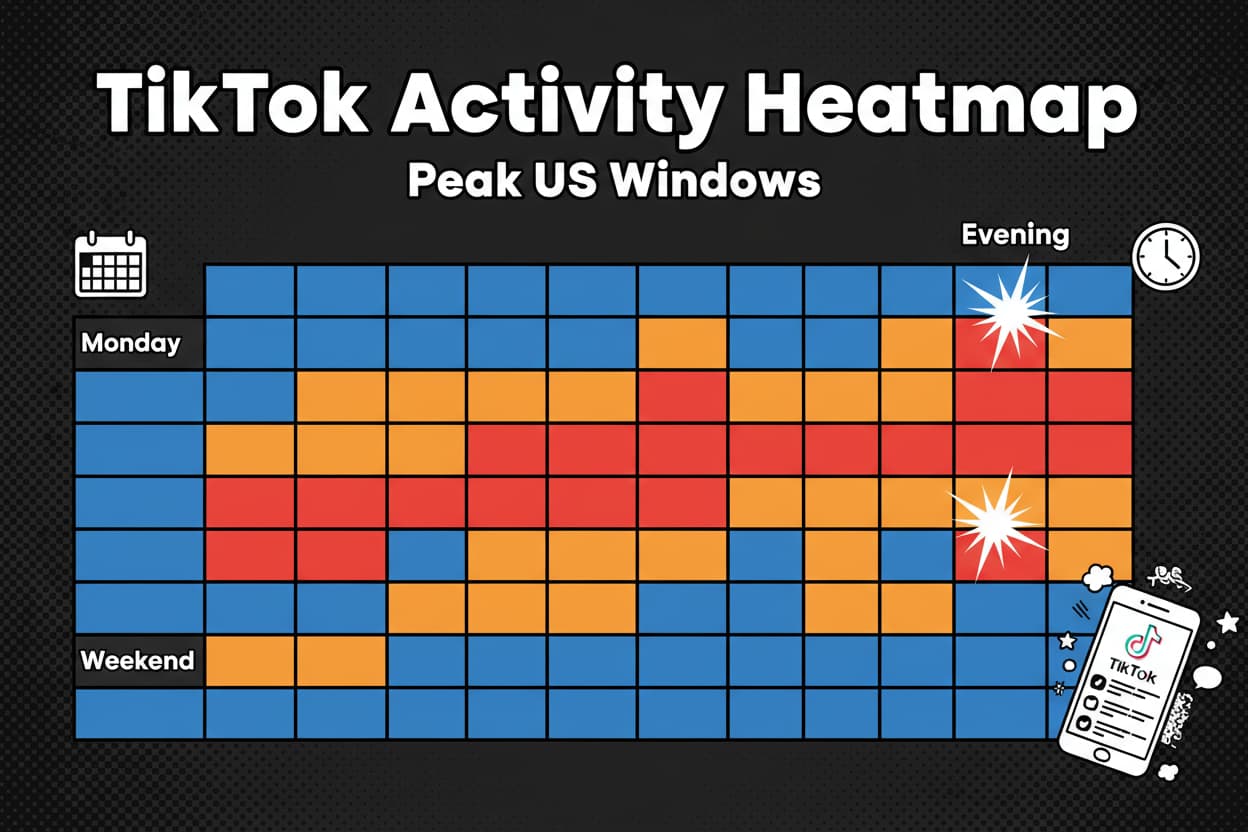
Next, scan the Follower activity chart. You’ll see hours of the day and days of the week where your followers are most active. This chart generally displays in the viewer’s local or device time, which means what you see is tied to your own timezone labeling rather than each follower’s location. Treat this as commonly observed behavior, not a platform guarantee [reference:2]. Also, the Follower activity section typically appears once you have enough data. Many creators report it shows up after the account crosses roughly 100 followers, again commonly observed rather than a hard rule [reference:2][reference:3].
Now jump to Content. Here you can open individual posts and check metrics like views, likes, comments, shares, and watch time. For scheduling, you’ll later bucket performance by publish hour and compare engagement per impression and 24-hour views. You don’t need to run that math yet. For now, just confirm you can see per-post data and that your recent posts have consistent tracking [reference:3].
Back in Followers, translate your top US cities into time zones. For example:
- New York, Miami, Atlanta map to ET.
- Chicago, Dallas, Minneapolis map to CT.
- Denver, Phoenix map to MT.
- Los Angeles, Seattle, San Francisco map to PT.
If ET and CT together represent most of your US audience, you’ll likely anchor your schedule in ET. If PT is heavy, you’ll either add a second wave for the West Coast or choose compromise windows that still capture ET late evening while hitting PT early evening.
A quick mini-case to illustrate. Imagine your Followers tab shows United States as the top country, with New York, Chicago, and Los Angeles as your top cities. In the Follower activity chart, you notice a persistent evening spike labeled 8 PM to 10 PM in your local time. Since the chart labeling is generally tied to your device’s timezone [reference:2], you note the spike but don’t stop there. You map the cities to ET, CT, and PT, then hypothesize two candidate windows: one that starts 30 to 60 minutes before the ET/CT evening crest, and one that catches a PT-heavy crest without missing ET entirely. You haven’t tested times yet, but you now have data-backed windows worth trying.
Two practical reminders as you prepare for deeper analysis. First, the Follower activity chart is a directional guide, not a stopwatch. Use it to find crests, then validate with your own post performance by hour. Second, early spikes in your graph can reflect what you’ve trained your audience to expect. If you always post late evening, you might see higher activity there simply because that’s when your fans are used to seeing you. We’ll correct for that by comparing normalized metrics across publish hours in the next section.
Now that you know where to find the numbers, let’s read them like a strategist. We’ll translate follower heatmaps and engagement graphs into precise posting windows.
Decoding Engagement Patterns: Identifying Your US Audience’s Peak Activity
Quick Answer
- Confirm US audience insights in Followers.
- Translate top US cities to ET/CT/MT/PT.
- Analyze last 28 days by publish hour and compute EPI and V24.
- Select 2–3 posting windows starting 30–60 minutes before peaks.
- A/B test windows for at least 2 weeks with comparable content.
- Iterate as the audience shifts.
Start in the Followers tab. Confirm the United States share, then note your Top Cities. This tells you which US time zones matter. The Follower activity chart shows when followers are active by hour and day. Creators commonly report that this chart labels hours in the viewer’s local or device time, not in each follower’s local time, so interpret the labels with care [reference:2]. Also, the Follower activity section usually appears only after the account has enough data, which many creators see after crossing roughly 100 followers, again commonly observed rather than a formal rule [reference:2][reference:3].
Now pair activity with your performance. Open the Content tab and export or log your recent posts. We’ll analyze performance by publish hour using normalized metrics, not just raw views [reference:3].
Here are the working definitions we’ll use:
- Engagement = likes + comments + shares + favorites + follows.
- EPI (engagement per impression) = Engagement ÷ Impressions.
- ERV (engagement per view) = Engagement ÷ Views.
- VTR (view-through rate) = Views ÷ Impressions.
- EPPH (engagement per post per hour bucket) = Total engagement in the bucket ÷ Number of posts in the bucket.
- V24 = views per post in the first 24 hours. You can also track E24 = engagement in the first 24 hours.
Why these? EPI and V24 cut through noise. EPI normalizes for exposure quality, while V24 measures early velocity, which strongly correlates with tiktok reach over the next day.
Aggregate your data like this:
- Convert each post’s publish time to a single US anchor time zone, usually ET. That keeps bucketing consistent across ET/CT/MT/PT.
- Bucket by hour-of-day and day-of-week. For example, all posts published 7:00 to 7:59 ET go in the same hour bucket.
- Compute metrics in two rolling windows: last 7 days for recency, last 28 days for stability. If you want extra rigor, weight by recency with a time-decay: weight = exp(-lambda × age_days), where lambda = ln(2) ÷ half_life_days.
Guardrails for confidence:
- Use a minimum of 5 posts or 10,000 impressions per hour bucket over 28 days before trusting it fully.
- If a bucket is thin, stabilize it with empirical-Bayes style shrinkage:
- Adjusted metric = w × bucket_metric + (1 – w) × global_metric.
- Set w = n ÷ (n + k). For post-based metrics, n = posts in the bucket and k might be 10. For impression-weighted proportions like EPI, use impressions-based n and a larger k such as 50,000. This pulls small samples toward your all-hours average so a single outlier doesn’t mislead you.
Next, map activity peaks to posting windows. From your Followers activity chart, mark the top 2 or 3 crests on weekdays and on weekends. Then apply a simple rule: publish 30 to 60 minutes before the crest. That lead time lets your content warm up as your audience comes online, so it hits the peak with momentum.
Because the US spans ET, CT, MT, and PT, weight your windows by audience share. Translate top cities to zones, estimate each zone’s share, then score candidate ET publishing times by how well they overlap each zone’s peaks:
- Score(T) = sum over zones z of [weight_z × overlap_minutes(T, peak_window_z)].
- Pick the top-scoring 2 or 3 times as your candidates.
A few pitfalls to avoid:
- Reading global data when you need US-only insights. Always sanity check Top Countries and Cities first [reference:3].
- Confusing your local/device time labels with follower local time. Treat the chart labels as your local view unless TikTok states otherwise in-product [reference:2].
- Theme confounds. If you only post comedy at 8 PM and tutorials at 2 PM, the hour difference might be a content effect. Compare within the same theme where possible.
- Recency bias. One viral outlier can skew averages. Use medians or trimmed means for a reality check, and keep your 28-day perspective.
Let’s pull this together with a quick example. Say your Followers tab shows US as your top country, with New York, Chicago, and Los Angeles topping cities. Your activity chart shows a pronounced evening crest labeled 8 to 10 PM on your device. You translate cities to ET, CT, PT, and estimate a zone split like ET 50 percent, CT 25 percent, PT 20 percent, MT 5 percent. You score candidate ET publish times that begin 30 to 60 minutes before that crest. You might shortlist 7:30 PM ET, 8:00 PM ET, and a PT-friendly option like 9:30 PM ET to catch West Coast after-work while still overlapping ET late night. You then validate these candidates against your 28-day EPI and V24 by publish hour. If 7:30 PM ET shows positive uplift vs your global average, it earns a test slot. If 8:00 PM ET underperforms after shrinkage, you shift it by 30 minutes and retest.
Industry benchmarks sometimes point to evening or after-school hours as strong performers, but these vary widely by niche and audience [VERIFY]. Your data wins. Use the framework above to confirm peaks for your account, then move into testing.
With your peaks identified, the next step is building a calendar you can actually follow. Here’s how to turn insights into a clear weekly schedule.
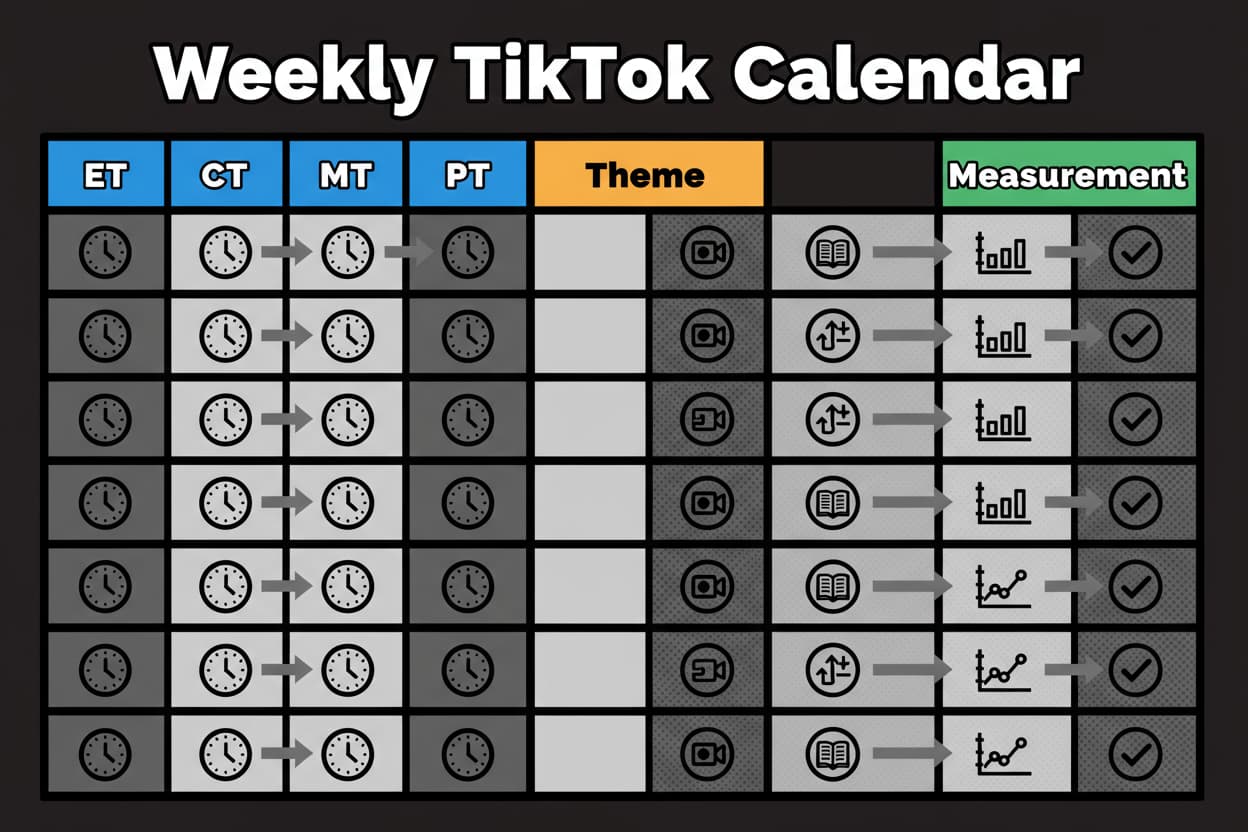
Building Your Data-Backed US TikTok Posting Schedule
You’ve got candidate windows. Now convert them into a clean TikTok US Posting Schedule that supports consistency and leaves room to learn.
Start by choosing an anchor. If ET plus CT make up most of your US audience, anchor in ET and list the CT/MT/PT equivalents under each slot. Keep the 30 to 60 minute lead time rule. That way your upload lands as the crest rises, not after it starts falling.
If your zone split is more even, design a two-wave plan. For example, one ET-anchored window that overlaps ET and CT, and a later ET window that maps to PT prime time while still catching ET late night. Your weighted scoring across zones will show which two times maximize overlap.
Use practical heuristics when your geo-split is mixed. These are strategy rules to speed decisions, not platform rules:
- US 70 percent or higher: go US-first. Optimize for your US zone distribution and build around 2 strong weekday windows plus 1 weekend.
- US 60 to 69 percent: US-first with light accommodation. Add a weekly slot for your second-largest region to test incremental reach.
- US 40 to 59 percent with another region 25 percent or higher: dual-region schedule. Alternate days or split daily slots so each region gets 2 to 3 weekly windows.
- US under 40 percent: global-first with one weekly US test slot. Watch if US share grows over time.
Also check viewer share vs follower share. If your US viewer share runs 10 points higher than follower share, that signals real consumption. In that borderline case, bias toward a US-first schedule even if follower share is just under your threshold.
To visualize, imagine you selected three candidate ET slots after your analysis: 7:30 PM ET on weekdays, 11:30 AM ET for midday tests, and 9:30 PM ET for West Coast overlap. Lay them out across Monday to Sunday, labeling the CT/MT/PT equivalents so your team always knows local times.
Design a simple A/B test you can run for two weeks without burning out your content pipeline. Keep content type and quality comparable across windows. Aim for at least 3 to 5 posts per window so one outlier doesn’t call the verdict. Track V24 and EPI as your decision metrics. If two slots tie on EPI, use completion rate and average watch time as your tiebreakers. Keep winners. Shift weak slots by 30 minutes and retest. Over a month, those small adjustments add up.
What if your data is messy or thin? Use these logic trees to stay decisive.
Low data volume. If you have fewer than 10 recent posts or fewer than 5 posts in a given hour bucket, widen the aperture. Aggregate to 2-hour buckets. Favor the 28-day window and apply the shrinkage formula so small samples lean toward your global average. Consider a temporary cadence bump for two weeks to gather enough observations. Then tighten buckets again.
Inconsistent weekly patterns. When an hour swings wildly, split your analysis into weekdays vs weekends. Compare within the same theme to avoid content confounds. Swap means for medians to reduce outlier influence. If a slot is unstable but promising, shift the start by 30 minutes and rerun the test rather than replacing it entirely.
Rapid audience shifts. Compare 7-day vs 28-day splits. If PT is growing fast, add a later ET slot that overlaps PT, or add a distinct PT-anchored slot twice a week. Re-score your time windows with the updated zone weights and shorten your iteration cycle until the new pattern stabilizes.
Global vs US mismatch. If the activity you see doesn’t line up with US behavior, confirm you’re reading Followers and Top Cities first [reference:3]. Remember the Followers activity chart commonly labels hours in your local/device time [reference:2]. Ensure your analysis buckets use a US anchor time like ET so you’re not mixing time bases.
Platform or trend noise. A trending sound or viral hit can temporarily distort totals. That is why you rely on normalized metrics like EPI and VTR, plus V24 as a velocity proxy. Keep testing across at least 3 to 5 posts per window before calling winners.
![]()
A brief scenario to show the workflow. A skincare brand sees US at 72 percent with cities weighted to ET and CT. They anchor in ET and test three windows: 7:30 PM ET Mon-Thu, 11:30 AM ET Tue-Thu, and 9:30 PM ET Fri-Sat to catch PT evening. After two weeks, 7:30 PM ET beats global EPI by a clear margin, 11:30 AM ET is flat, and 9:30 PM ET is inconsistent. They keep 7:30 PM ET, shift the midday slot to 12:00 PM ET for another test cycle, and move the late slot forward to 9:00 PM ET to improve overlap for both ET night owls and PT prime time. Their calendar remains consistent, but the exact minutes evolve as data comes in.
Keep your refinement loop tight but calm. Every two to four weeks, re-run the hour-by-hour rollup, check your 7-day view for new trends, and look at Top Cities for any zone drift. Update your zone weights if needed, then rescore your candidate times. If a slot underperforms for two consecutive test cycles, retire it and promote your next highest scorer. Tie your schedule to content themes too. For example, if tutorials repeatedly win at midday, assign that theme to your best midday slot while reserving your evening slot for entertainment-first pieces.
One more workflow tip. Document decisions in a tracker alongside the numbers. Note the content theme, hook, and any unusual context that might influence results. When you later analyze EPI and V24, those notes explain outliers and keep your schedule changes grounded.
Once your core cadence is set, small optimizations compound. We’ll use scheduling tools and A/B testing to automate and refine your US posting windows.
Advanced Tips: Maximizing Reach and Engagement with TikTok Scheduling Tools
Your schedule is set. Now let’s automate the workflow and tighten your A/B testing so you keep compounding gains.
Start with TikTok’s native scheduler for simplicity. It lives on desktop at tiktok.com and lets Creator and Business accounts schedule uploads up to 10 days ahead. Once a post is scheduled you can’t edit the caption, video, or time; if you need to change anything, you’ll delete and re-upload. It uses your computer’s time zone at the moment you set it, so double-check your system clock before confirming [reference:1].
This native option is perfect for a lean team testing 2 or 3 windows weekly. Batch your videos, queue them into your chosen ET-anchored windows, and label each one in your tracker with the publish time, content theme, and the test cell it belongs to. That way you can compare EPI and V24 at the end of each test cycle, not guess.
If you manage multiple brands or collaborate with a bigger team, third-party tools can streamline multi-account calendars and analytics views. Since tool features change, avoid locking decisions on unverified claims. Use the comparison table below as a planning scaffold and fill it only after you verify each row on a vendor’s official site.
| Tool | TikTok Direct Publish | Best-time Suggestions | Analytics Depth | A/B Testing | Bulk/Scheduling Limits | Pricing (entry tier) | Ideal For |
|---|---|---|---|---|---|---|---|
| TikTok built-in scheduler | Verify | Verify | Verify | Verify | Verify | Free (Verify) | Verify |
| Later | Verify | Verify | Verify | Verify | Verify | $/mo (Verify) | Verify |
| Hootsuite | Verify | Verify | Verify | Verify | Verify | $/mo (Verify) | Verify |
| Sprout Social | Verify | Verify | Verify | Verify | Verify | $/mo (Verify) | Verify |
| Buffer | Verify | Verify | Verify | Verify | Verify | $/mo (Verify) | Verify |
| Metricool | Verify | Verify | Verify | Verify | Verify | $/mo (Verify) | Verify |
| Loomly | Verify | Verify | Verify | Verify | Verify | $/mo (Verify) | Verify |
| Planoly | Verify | Verify | Verify | Verify | Verify | $/mo (Verify) | Verify |
How do you push A/B testing further without adding chaos? Keep your tests simple and controlled. Run at most 3 posting windows at a time, post comparable content in each window, and log V24 and EPI. If one cell wins by a practical margin on both metrics for two cycles, promote it to your core cadence. If a cell lags, shift by 30 minutes and rerun. Two cycles is often enough to call a directional winner.
If your team offers or relies on tiktok content production services, plug the schedule into your production board. Assign themes to specific windows, stack footage deadlines two days ahead of publish times, and lock captions 24 hours in advance. That buffer makes native scheduling smooth and protects your A/B test integrity. No last-minute swaps that muddy the data.
One more pro move. Tag the test cell in your internal tracker consistently, not in your captions. Add a short code in your spreadsheet like “W1-ET1930” for the 7:30 PM ET window. That keeps your analytics clean and your creative audience-first.
As you optimize, questions pop up: split audiences, mixed content types, measuring impact. The FAQ section anticipates those and gives you decisive answers.
Frequently Asked Questions About TikTok Analytics and US Posting Schedules
Q: How often should I review my tiktok analytics and adjust my schedule?
A: Follow the loop cadence. Every 2 to 4 weeks, re-run your hour-by-hour rollup for the last 28 days, check a 7-day view for emerging shifts, and re-score your candidate windows. If your account is growing fast or you see a new US zone rising, switch to weekly checks until patterns stabilize. The Followers activity chart is a helpful directional guide and is commonly reported to label hours in your local/device time, but treat it as one input. Confirm with your per-post performance before you move windows [reference:2][reference:3].
Q: My audience is split between the US and another region. How should I schedule?
A: Use the geo-split thresholds as a clear starting point. If the US is 70 percent or higher, run a US-first schedule. Between 60 and 69 percent, go US-first and add one weekly slot for the second region to probe incremental reach. If the US is 40 to 59 percent and another region is at least 25 percent, run a dual-region plan and give each region 2 to 3 weekly windows. Below 40 percent US, go global-first and keep a weekly US test slot. Also compare viewer share to follower share. If US viewers are materially higher than US followers, bias toward US-first because viewing behavior reflects real consumption.
Q: Can one schedule fit all content types?
A: Not perfectly. Some themes naturally perform better at different hours. Tutorials often win midday when attention is practical. Entertainment leans into evening leisure. Use theme-slotting. Anchor your strongest windows with your proven theme. Then allocate secondary windows to experimental or niche themes. If a theme underperforms in a slot for two cycles, swap its slot before dropping the slot entirely. Keep your posting cadence stable while you move the right content into the right window.
Q: How do I prove that schedule changes improved my tiktok reach?
A: Compare normalized metrics before and after. Use EPI and V24 as your primary decision signals. EPI tells you how efficiently impressions convert to engagement. V24 is your velocity proxy. For tie-breakers, check completion rate and average watch time. When sample sizes are small, stabilize with the shrinkage method you used earlier so single outliers don’t skew your verdict. Aim for minimums like 3 to 5 posts per window before you call a winner.
Q: The Followers activity chart times look off. What time zone are they in?
A: Creators commonly observe that the Follower activity chart labels hours in the viewer’s local or device time. Treat the labels as your local view unless TikTok clearly states otherwise in-product. Also, the Followers activity section tends to appear once the account has accumulated enough data, which many creators report around the 100-follower mark. Both points should be treated as commonly observed rather than formal platform rules [reference:2][reference:3]. Either way, always translate your Top Cities into ET/CT/MT/PT and anchor your analysis to a consistent US time base.
Q: Do scheduled posts perform worse than manual posts?
A: There’s no platform guidance that scheduled posts are penalized. TikTok’s native scheduler publishes directly from desktop and is intended for planning, not a workaround. It supports Creator and Business accounts, schedules up to 10 days out, and doesn’t allow edits after scheduling, which keeps the workflow predictable [reference:1]. Your results will still come down to content quality and whether you post into your audience’s peak windows.
Q: How many times per day should I post?
A: Focus on quality and consistency first. For most brands, 1 high-quality daily post in a proven window will outperform 3 average posts scattered across weak hours. If you have the pipeline, add a second daily slot only after your first slot is reliably beating your global average on EPI and V24. Use the weighted time-zone scoring so the second slot complements, not cannibalizes, the first.
Q: What if my results are inconsistent week to week?
A: Split your analysis into weekdays and weekends. Compare within the same content theme. Use medians to blunt outliers. If a slot is promising but jumpy, shift the window by 30 minutes and add one more test cycle. Also watch for platform or trend noise. A trending sound can inflate V24 without improving EPI. Normalize before you decide.
Q: Should I change windows during a big campaign?
A: No. Lock your posting windows before the campaign and keep them stable until it ends. Changing windows mid-campaign makes it hard to attribute results. Run your A/B tests before and after, not during. If analytics show a sudden audience shift, document it and adapt after the campaign window closes.
You now have a working system. The final step is committing to the loop: analyze, schedule, test, and iterate. Here’s a quick checklist to keep momentum.
Conclusion: Take Control of Your TikTok Success with Analytics-Driven Scheduling
You built a US-focused schedule from the ground up. You audited your tiktok analytics, aggregated performance by hour in a consistent time base, mapped peaks to posting windows, tested them, and iterated. Keep running that loop and your baseline will climb.
Here’s the short version of the process you just mastered. Audit → Aggregate → Map → Test → Iterate. It’s simple, and it scales with you. When your audience shifts zones, the framework shifts with it. When your content themes evolve, the loop tells you which windows to promote or retire.
Use the checklist below to guide your next cycle. It keeps your analysis clean, your schedule consistent, and your results compounding.
- Confirm Creator/Business analytics access and verify account time zone.
- Record the last 28–60 days of post performance with publish times.
- Check US share, top cities, and hourly follower activity in Followers.
- Convert top cities to ET/CT/MT/PT and note peak windows.
- Compute normalized metrics by publish hour (EPI and 24-hour views).
- Select 2–3 candidate posting windows starting 30–60 minutes before peaks.
- Test each window for at least 3–5 posts and compare uplift vs global average.
- Lock in winners, shift weak slots by 30 minutes, and retest.
- Re-run the analysis every few weeks or when your audience shifts.
Want a done-for-you, analytics-driven TikTok schedule? Talk to our team. We’ll audit your account, map US peak windows, and build a production-ready calendar aligned to your goals.
Ask about our content production services to pair scheduling with consistent, on-brand videos.
You’ve got the framework, the formulas, and the workflows. Start with two strong windows, run clean tests, and keep iterating. Small, steady improvements stack fast. Your next breakthrough post is a schedule tweak away.
Replace example.com with the site’s actual domain before publication.
{
"@context": "https://schema.org",
"@type": "HowTo",
"name": "Determine the best TikTok posting times in the US using analytics",
"description": "A step-by-step method to use TikTok analytics to find and test your optimal US posting windows, then build a repeatable schedule.",
"totalTime": "PT2H",
"supply": [
{
"@type": "HowToSupply",
"name": "Creator or Business TikTok account with analytics enabled"
},
{
"@type": "HowToSupply",
"name": "Spreadsheet or dashboard for logging metrics"
}
],
"tool": [
{
"@type": "HowToTool",
"name": "TikTok app or desktop analytics"
},
{
"@type": "HowToTool",
"name": "Scheduling tool (optional)"
}
],
"image": [
{
"@type": "ImageObject",
"url": "https://example.com/images/tiktok-analytics-dashboard-annotated.png",
"description": "Annotated TikTok analytics dashboard highlighting US audience and follower activity data."
},
{
"@type": "ImageObject",
"url": "https://example.com/images/tiktok-follower-activity-heatmap-template.png",
"description": "7x24 follower activity heatmap for mapping peak hours."
},
{
"@type": "ImageObject",
"url": "https://example.com/images/us-tiktok-posting-calendar-template.png",
"description": "US posting calendar template with ET, CT, MT, PT columns."
}
],
"step": [
{
"@type": "HowToStep",
"name": "Confirm your US audience insights",
"text": "Open TikTok Analytics and go to Followers to confirm your US audience share, top cities, and hourly follower activity."
},
{
"@type": "HowToStep",
"name": "Translate cities to time zones",
"text": "Convert top US cities to ET, CT, MT, and PT and note the hours with the highest activity in each zone."
},
{
"@type": "HowToStep",
"name": "Analyze your last 28 days by publish hour",
"text": "Bucket recent posts by publish hour and compute engagement per impression and 24-hour views for each hour."
},
{
"@type": "HowToStep",
"name": "Select candidate posting windows",
"text": "Pick 2–3 windows that begin 30–60 minutes before peak activity and cover your weighted US time zones."
},
{
"@type": "HowToStep",
"name": "A/B test windows with comparable content",
"text": "Post consistently in each window for at least two weeks and compare EPI and 24-hour views to choose winners."
},
{
"@type": "HowToStep",
"name": "Iterate as your audience shifts",
"text": "Recheck analytics every few weeks and adjust windows when follower activity or US time zone distribution changes."
}
]
}
Key Takeaways
- Timing is a growth lever. Use tiktok analytics to post 30 to 60 minutes before your US peaks.
- Anchor analysis in a single US time base, bucket by publish hour, and track EPI and V24.
- Apply geo-split thresholds to decide US-first vs dual-region schedules.
- A/B test 2 or 3 windows at a time, 3 to 5 posts per window, then keep winners.
- Re-run the loop every few weeks so your schedule evolves with your audience.